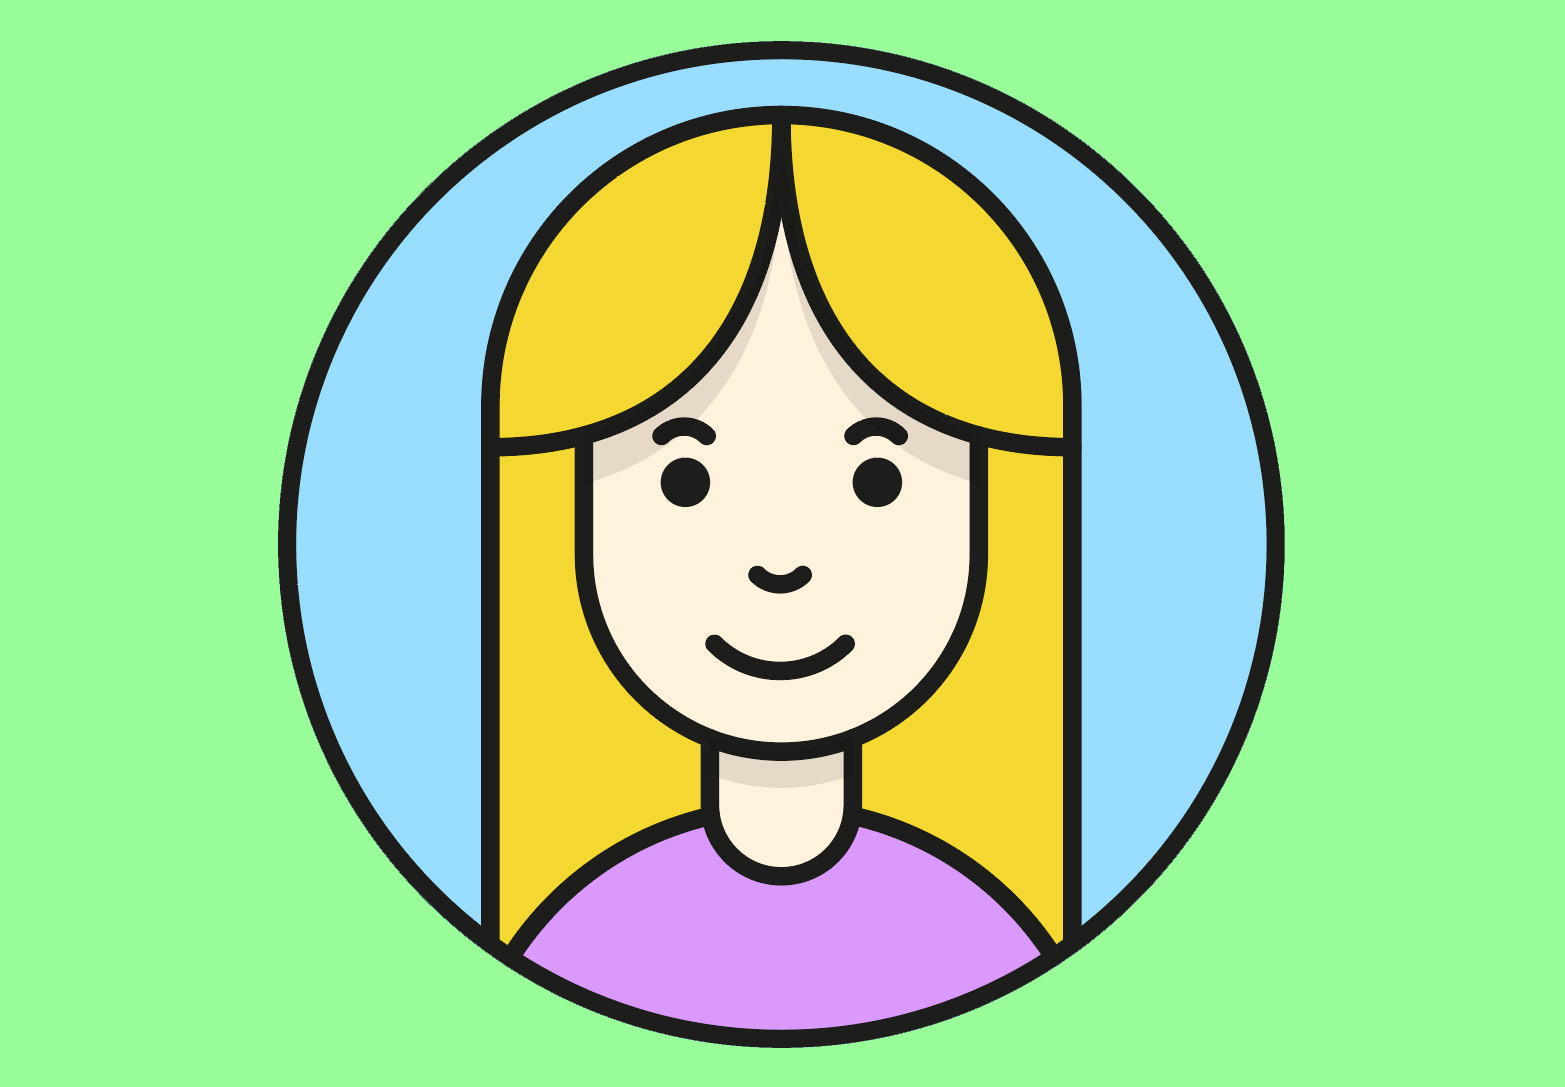
It’s always fun making character illustrations, but even more so when that character is based on an actual person! Cartoon style avatars are commonly used for their balance between resembling the person they’re representing, whilst retaining some anonymity. In today’s tutorial we’ll use the vector tools in Adobe Illustrator to produce a simple avatar character with a line art style and flat colours. We’ll build the character in such a way that it’s somewhat modular, where multiple personas can be built from one basic foundation.
![]()
The character design we’ll be making in this tutorial is completely simplified into basic shapes to produce a generic facial profile that can be built upon with different hairstyles and skin tones to represent different people. This kind of artwork could be particularly useful for ‘Meet the team’ pages, where a whole range of characters would have a consistent style, but certain characteristics would allow these simple avatars to be recognised as the person they represent.
![]()
The avatar illustrations will be enclosed within a circle, so draw an Ellipse while holding the Shift key, then clear out the default while fill. Increase the Stroke weight to 6pt, and check the Round Cap option.
![]()
Draw a Rectangle within the circle. Select both objects, then give the circle an extra click to make it the Key Object. Use the Horizontal Align Center button in the Align panel to centre the rectangle within the circle.
![]()
Grab the Direct Selection tool, then click and drag the corner widgets to round off the corners of the rectangle. Users of older versions of Illustrator might instead want to use the Rounded Rectangle tool, or the Effect > Stylize > Round Corners menu.
![]()
Select the Ellipse tool again and draw a small circle to represent an eye. Switch the stroke over to a fill in the toolbar.
![]()
Hold the ALT and Shift keys while dragging the shape to make a copy. Position it on the other side of the face, then select both eyes and group them together.
![]()
Shift and click the facial outline to add it to the selection, then release the Shift key and give the face an extra click to make it the key object. The key object will remain in place, allowing just the eyes to be moved into alignment when the Horizontal Align Center button is clicked.
![]()
Draw a circle somewhere on the artboard, then use the Direct Selection tool to select and delete two of the four points that form the circle, leaving a quarter circle. The Round Cap stroke option will also be applied to this path.
![]()
Rotate the path by 45 degrees and move it into place as an eyebrow above the eye circle.
![]()
Make copies of the quarter-circle path for use as the other eyebrow, nose and mouth. Scale up the mouth path to enlarge it slightly.
![]()
Draw a smaller rectangle and select just the two bottom points with the Direct Selection tool, round off the corners using the corner widgets.
![]()
Move this rectangle into place to represent a neck. If you have Smart Guides enabled under the View menu, the tooltips will make it easy to snap the shape into place centrally.
![]()
To remove the overlap between the shape, select the neck rectangle, then activate the Scissors tool. Click where the two paths intersect and delete the unwanted portion.
![]()
Draw a large circle to represent the shoulders. The circle will extend way beyond the avatar outline in order to achieve the desired arc, but the excess can be trimmed with the Scissors tool.
![]()
Cut the path wherever it extends beyond the main circular outline, or where it overlaps with the next shape.
![]()
Draw a selection around all the paths and shapes that form this basic foundation for our character. Hold the ALT key and drag a copy to one side to use again later.
![]()
Let’s begin customising this basic face with a hairstyle. Draw a large rectangle, aligned centrally with the character. Round off the top two corners.
![]()
Use the Scissors tool to cut and trim the path where it extends beyond the circular outline.
![]()
To create a parting in the hair, use the Arc tool to draw a path from the top centre point, extending to the vertical portion of the path. Press the F key to flip the arc and use the keyboard cursor keys to alter the radius.
![]()
Use the Scissors tool to delete the unwanted overlap, so the hair appears to cover part of the face.
![]()
The basic line art uses just simple shapes and paths, but the result is a cute and friendly character with a stylish appearance.
![]()
Make a copy of the blank character artwork to customise it into a different person. This time draw lots of circles to form some short, curly hair.
![]()
Select all the circles and click the Unite button in the Pathfinder panel to merge them all into one outline.
![]()
Trim the overlapping facial outline to see the avatar design already looks like a totally different character.
![]()
This character doesn’t have any hair covering the ears, so delete the point of a circle to form a semi-circle. Position one on each side of the head.
![]()
Characters can be customised further with accessories such as glasses. Draw a small rectangle and round the corners slightly with the Direct Selection tool.
![]()
The addition of glasses completely transforms the same facial artwork into a totally new avatar character.
![]()
The easiest way to add colour to the illustrations is with the Live Paint Bucket tool. Select all the paths and shapes, then click with the Live Paint Bucket tool to turn it into Live Paint group.
![]()
Deselect everything and set up a fill colour. Click the shapes of the artwork to apply this colour using the Live Paint Bucket tool.
![]()
Despite the artwork being made with lots of open paths, the Live Paint Bucket tool allows you to fill these shapes as if they were closed paths.
![]()
Matching the hair colour and skin tone of the avatar character to its person makes it even more recognisable.
![]()
One extra detail that can bring the illustration to life is some simple shading. Go to Object > Expand to permanently apply the Live Paint fills. Select just the Object option.
![]()
Repeatedly right click and choose Ungroup until the artwork has been completely broken apart into individual pieces.
![]()
Select one of the hair shapes and press CMD+C to Copy, followed by CMD+F for Paste in Front. Change the fill colour to Black with 10% opacity. Nudge the shape downwards to overlap with the face.
![]()
Use the Pen tool to roughly draw around the unwanted areas of this black duplicate shape to form a temporary tool to use with the Pathfinder. Select both shapes and click the Minus Front button.
![]()
Repeat the process using a copy of the main face shape to create a small shadow on the neck. Use the Arrange > Bring to Front menu to place the shape on top of the other artwork.
![]()
Draw a rough outline around the areas you want to delete using the Pen tool, then select both shapes and click the Minus Front button in the Pathfinder panel.
![]()
The final result is a fun vector character design that’s perfect for use as an online avatar graphic. The simple artwork gives the design a stylish appearance, while also helping the graphic display more clearly at small sizes. By constructing numerous profiles using different hairstyles, facial features, colours and skintones, you can quickly build a large collection of characters that complement each other with a consistent art style.


Hey Chris,
That was an amazing tutorial. Frankly speaking, I did a course on Adobe Illustrator, but I haven’t touched it in years and I am a lot out of practice. This was quite a refreshing crash course of getting the hang of the basics once again. Thanks for sharing this!
Its always fun to implement your tutorials Chris thanks a lot for sharing all the resources.
I finally was able to create my vector avatar. Thank you so much for the tut.
It is really a very useful tutorial Chris.
I enjoyed this one! As always the simple methods you’ve demonstrated open a lot of doors in Illustrator. Thanks!
Such a great post to know different useful information.
Wow this tutorial it’s so easy!
I’m trying to make my dad avatar :D
Thanks man
Thank you! This type of websites are not always easy to find! Graphicmama’s the best!
Do you do tutorials for Coreldraw?